
In part one here I wrote about a little Audio Visual install project I am currently doing at my own house in England. I am further on into the project than these new pictures suggest, but I’ll do a series of posts showing this project from start to finish, the final finish could be a few weeks away yet.
I am on a pretty tight budget so I have made some purchase decisions that reflect this, but hey that’s life. However most of the components needed I have purchased at trade prices which certainly helps, although some items were purchased via eBay like my HDTV wall mount brackets as they were the cheapest out there.
These pictures where taken on my iPod touch so you will have to excuse the pretty poor picture quality on some of them.
Ideally I would have wanted a small comms cabinet but there’s that budget thing again to think about, so I opted for a simple 1U wall mount bracket, these are manufactured by StarTech. I bought a 24 port patch panel off eBay, more than I will need in this house. I so far have 14 network cables terminated in to the back of it, I may add another 4 or so, two in the kitchen and another 2 ports behind my lazy boy chair in the lounge for when I am sick of the WIFI being crap and I can just use a LAN cable with the laptop.
1U Wall Bracket plus Patch Panel – Cupboard under the stairs.
.JPG?psid=1)
.JPG?psid=1)
.JPG?psid=1)
To route the cables from this cupboard to the location in the living room where the Network wall plates are, I used a cable fish tape like this one to pull the cables under the floor space. Totally invaluable tool and I used this for most of the cable installations under the floors and through walls.

Living Room – Plastered
I was going to get my brother to do the plastering he’s pretty handy but not a professional plasterer. However as I was putting in new ceiling speakers upstairs I decided to have all the ceilings upstairs plastered smooth, so called in an expert and had him fill in the walls as well.
For the channel in the wall for the AV cables I used 100mm x 25mm trunking. I thought this would be plenty wide enough to be able to fish in cables at a later date. The new electric socket for behind the TV was just a spur from the socket below and I used capping in the wall to protect the mains cable.
.JPG?psid=1)
The metal back boxes for the AV wall plates are 35mm deep, I did initially buy 47mm deep ones but these were far too deep for my block walls. The electrical socket back boxes are just a standard 25mm deep.
.JPG?psid=1)
In this photo you can see the network and speakers cables going down under the floor space, the network cables all obviously go back to the patch panel and the speaker cables go to 5.1 positions in the living room.
.JPG?psid=1)
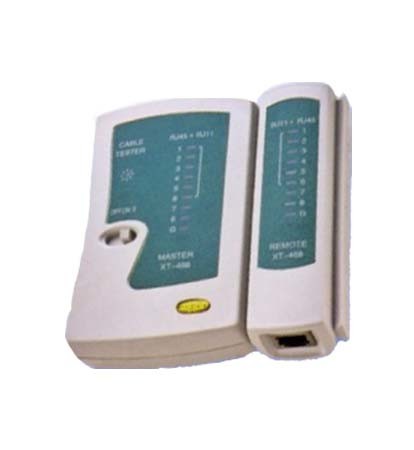
Its very important to label up each end of each cable so you know which cable is which when numbering your network points up. I also bought a cheap network cable tester off eBay like this one, this was useful as it did detect a few pins on some cables I had either wired up incorrectly or not fully punched down into the patch panel / network wall plates.
On the picture below, I’ve got the wall bracket on the wall, my living room is an odd shape, I have a small porch - stud partition wall / internal door coming into it and the stairs are at the back of the living room, there’s only one place the 3 seater sofa can be positioned, so my only option is to have the TV in the corner near the bay window, so I could not have a flush to the wall type bracket, instead I’ve gone for a full motion pull out and swivel / tilt type bracket, which was about 40 pounds off eBay from a company called Intec Brackets
.JPG?psid=1)
On this picture you can see the speaker wall plates in the living room, these have binding posts, I bought some banana plugs to easily connect the amps to them. There is 5.1 plus Sub and the other speaker socket next to it is for the speakers in the kitchen, I’ve not got a proper AVR yet but when I buy one, Zone two will connect to the kitchen speakers. The next wall plate is 4 network points.
.JPG?psid=1)
These are the other AV wall plates in the Living room, top left is Composite video + audio, right of that is Component video RGB plus audio, bottom left is a TOSLINK optical point for digital audio directly out of the back of the TV, to the right of this is an HDMI wall plate.
On the left near the radiator you can notice an NTL cable socket. I’ve not decided yet if to go for Virgin Media cable Internet or try and get this new BT Infinity fibre optic Internet if its available in my area? I’ve routed both a coax cable from this NTL socket and a CAT5e cable from the back of the BT master phone socket into the cupboard under the stairs, so I can have either type of modem installed in there.
.JPG?psid=1)
I’ve simply used one of those brush face plates for the AV cables exit at the top of the channel, I’ve also added two network points behind every TV. None of my HDTV’s are Internet ready or have LAN connections, so these are for future use.
.JPG?psid=1)
The AV cables still need cutting to length and terminating with RCA connectors.
.JPG?psid=1)
Well I think that’s about it for part 2, see you again in part 3 soon.
No comments:
Post a Comment